A Beginner’s Guide to Making and Basing Paper Miniatures
Playing any in-person TTRPG with miniatures has lots of benefits, but newcomers to the Marvel Multiverse RPG might not have any on hand, and building a collection is a daunting (and expensive) task. Paper miniatures are a versatile and extremely cost-effective solution… so long as they’re not constantly falling over or getting blown off the board every time some exhales at the table. Here are three ways even a complete beginner can create paper minis with solid and stable bases that will stand up to regular use.

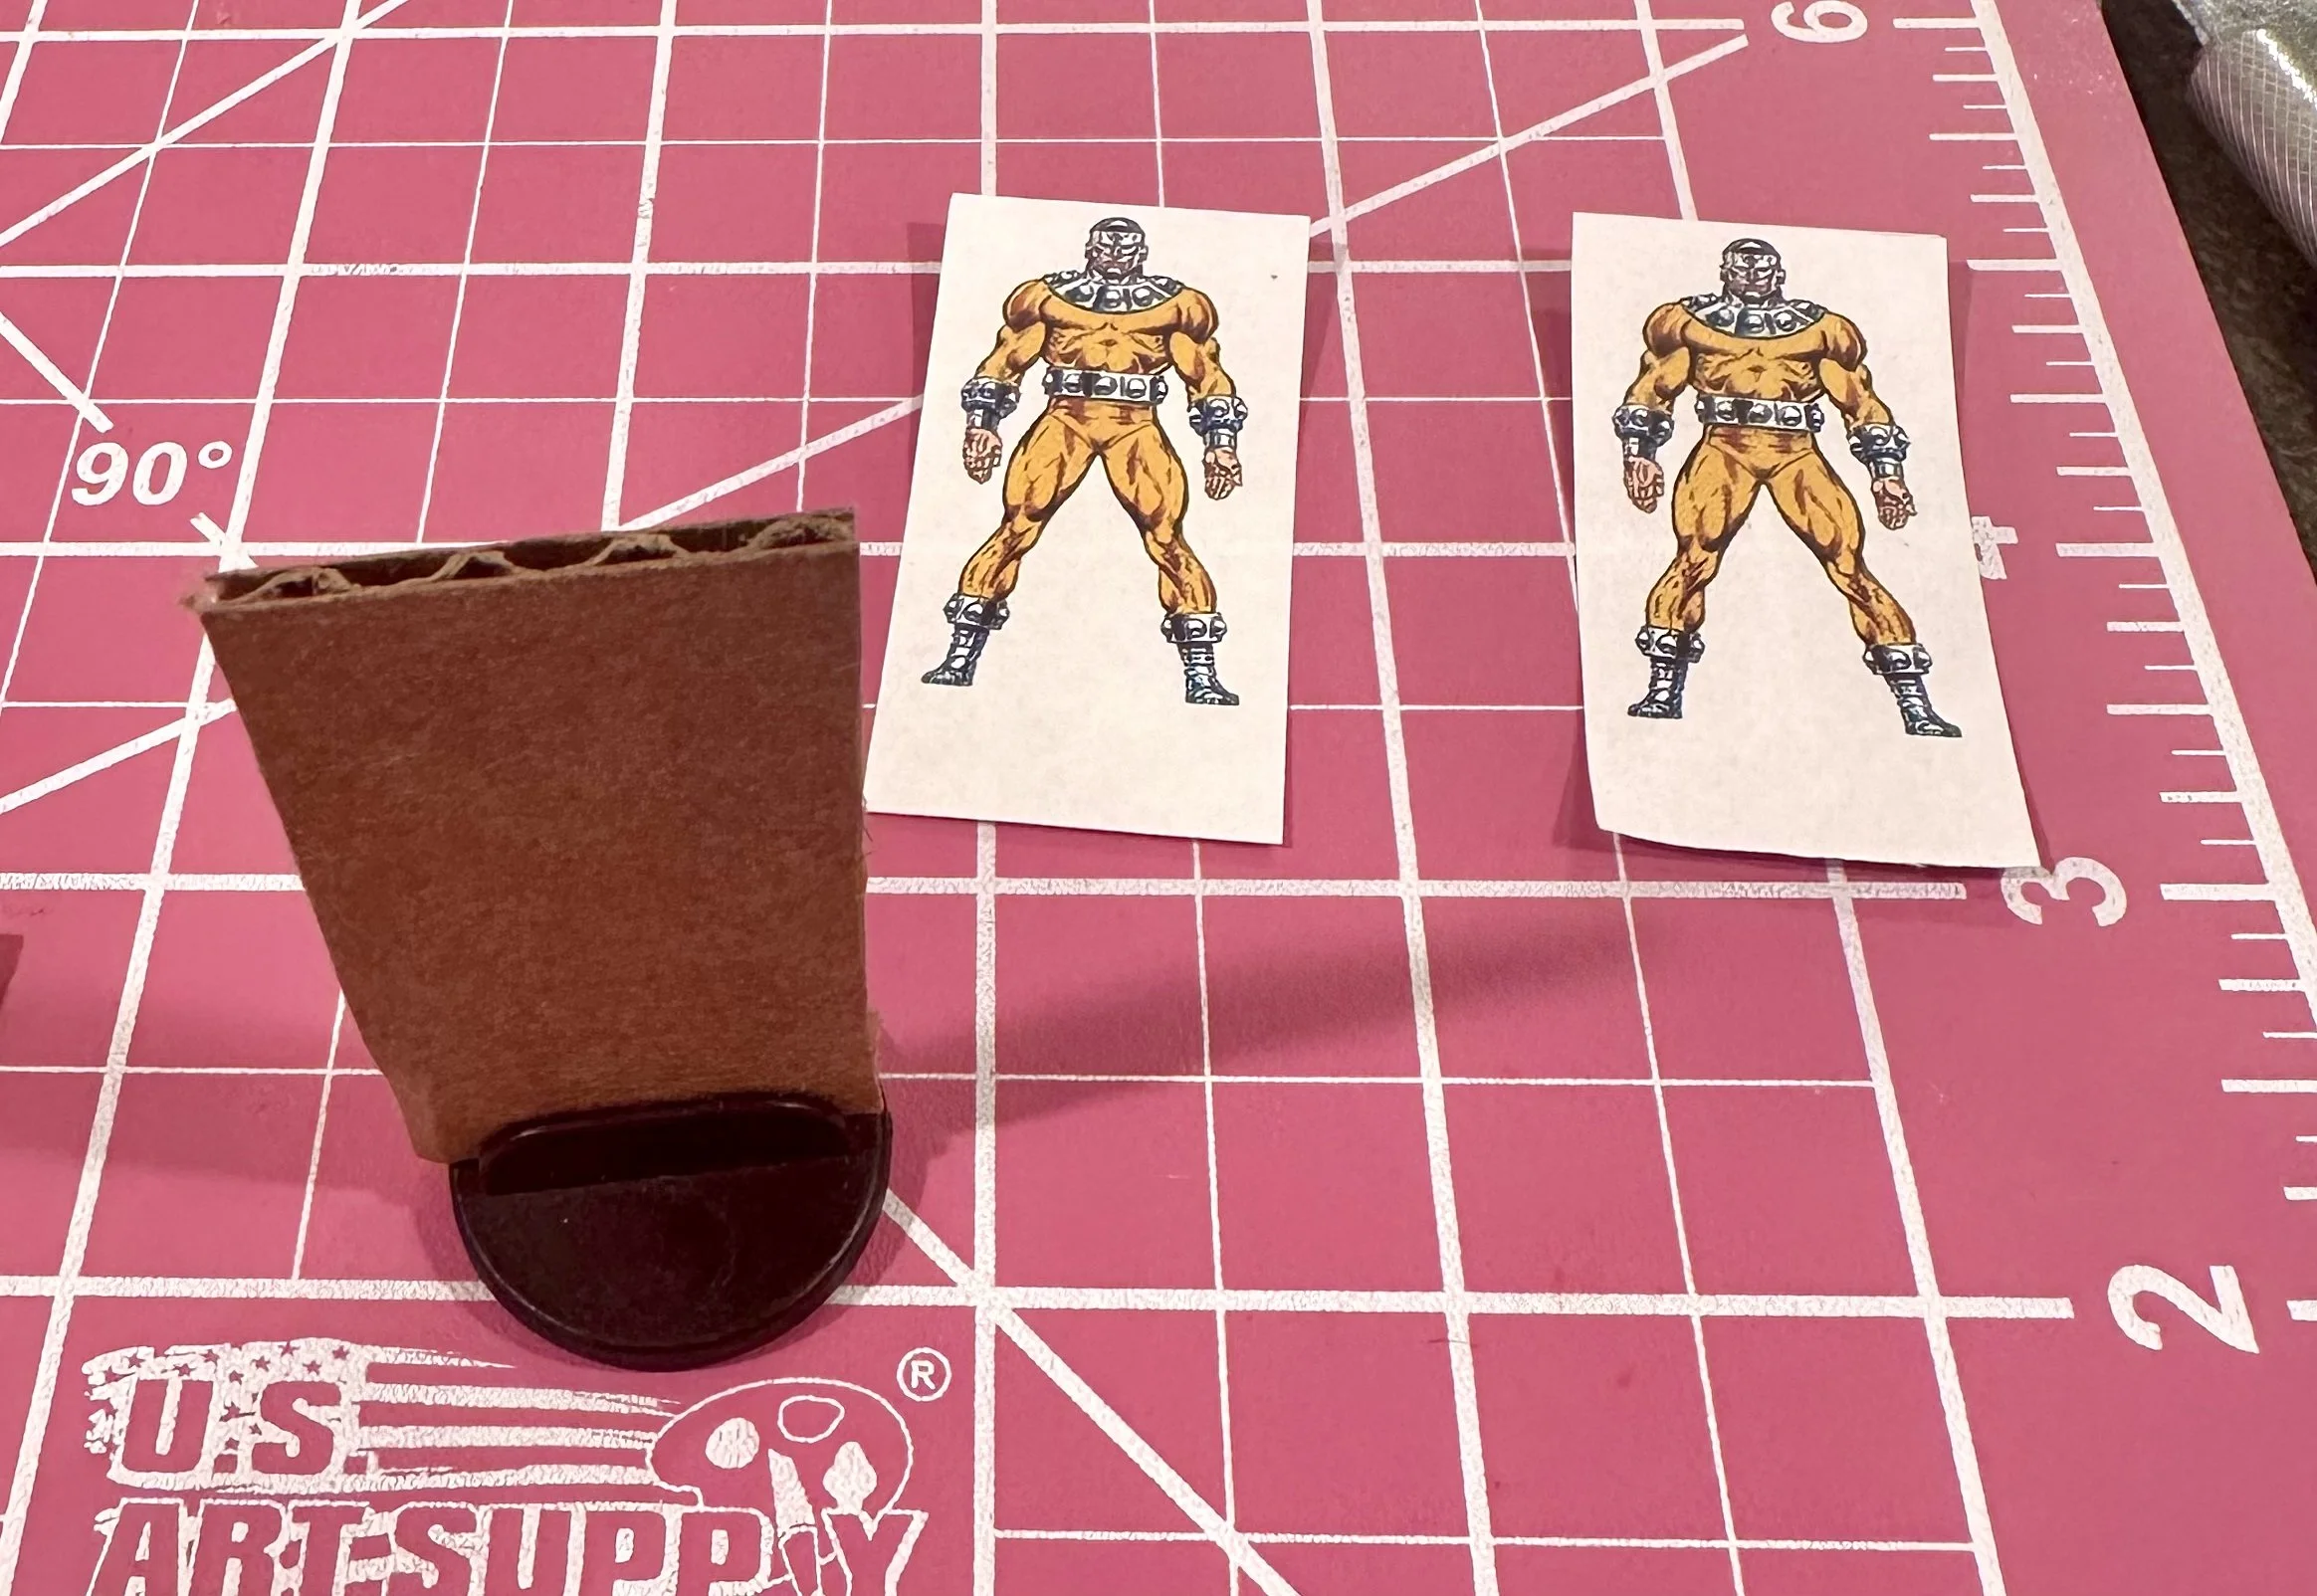
The first thing you’ll want to do is print up whatever images you’d to turn into a miniature - two copies of each, so you can have an image on the front and back. Make sure to leave a little padding between each image, and be sure to select an image that doesn’t have a background. You’ll want your minis to be about 1 inch wide and 1.5 to 2.0 inches tall. I’ve chosen three members of the Wrecking Crew to demonstrate each of the options. We’ll review the pros and cons of each approach at the end of the article.
APPROACH #1 - Using a plastic card stand
The first approach requires you have some plastic card stand bases on hand (see the picture below). You may have some from board games you’re no longer using, or from a set of cardboard miniatures (aka “pawns”) you’ve purchased for another TTRPG. Personally, I had a bunch from a set of Pathfinder pawns I don’t get much use out of, so I’m going with those. If you don’t own any, you can pick some up on Amazon relatively cheaply - 25 for 6 US Dollars. Just search for “Plastic Game Card Stands”. Be sure they are 1 inch in diameter - that’s the standard size of most game grids.
STEP 1: Cut your mini to size. Depending on your preference, and whether the plastic stand you have is transparent or not, you may want to leave approximately 1/2 inch below the feet, so the base doesn’t cover any of the art. Again, the bases are usually 1” in diameter, so you’ll want your paper mini to be about the same width.

Step 2: Find a piece of cardboard that fits snugly in your stand. You should be able to pick it up by the cardboard without the base falling off. Once you’ve got a piece that works (and is free from any creases), you can cut it down to size. Measure carefully, using your already trimmed-to-size paper mini. Using a hobby knife like an X-ACTO is more precise than scissors, but use what you’ve got!
Step 3: Remove the cardboard from the stand, and glue the paper miniatures to each side of the cardboard. You can use Elmer’s glue. Personally, I use mod podge since my kids seem to have gallons of it. I’ve used glue sticks in the past, but I don’t recommend them. The paper may peel off after even just moderate use. You may want to put something flat and somewhat weighty on top of it while it is drying to ensure it remains flat (something plastic would be better than paper or cardboard, to ensure it doesn’t accidentally stick).
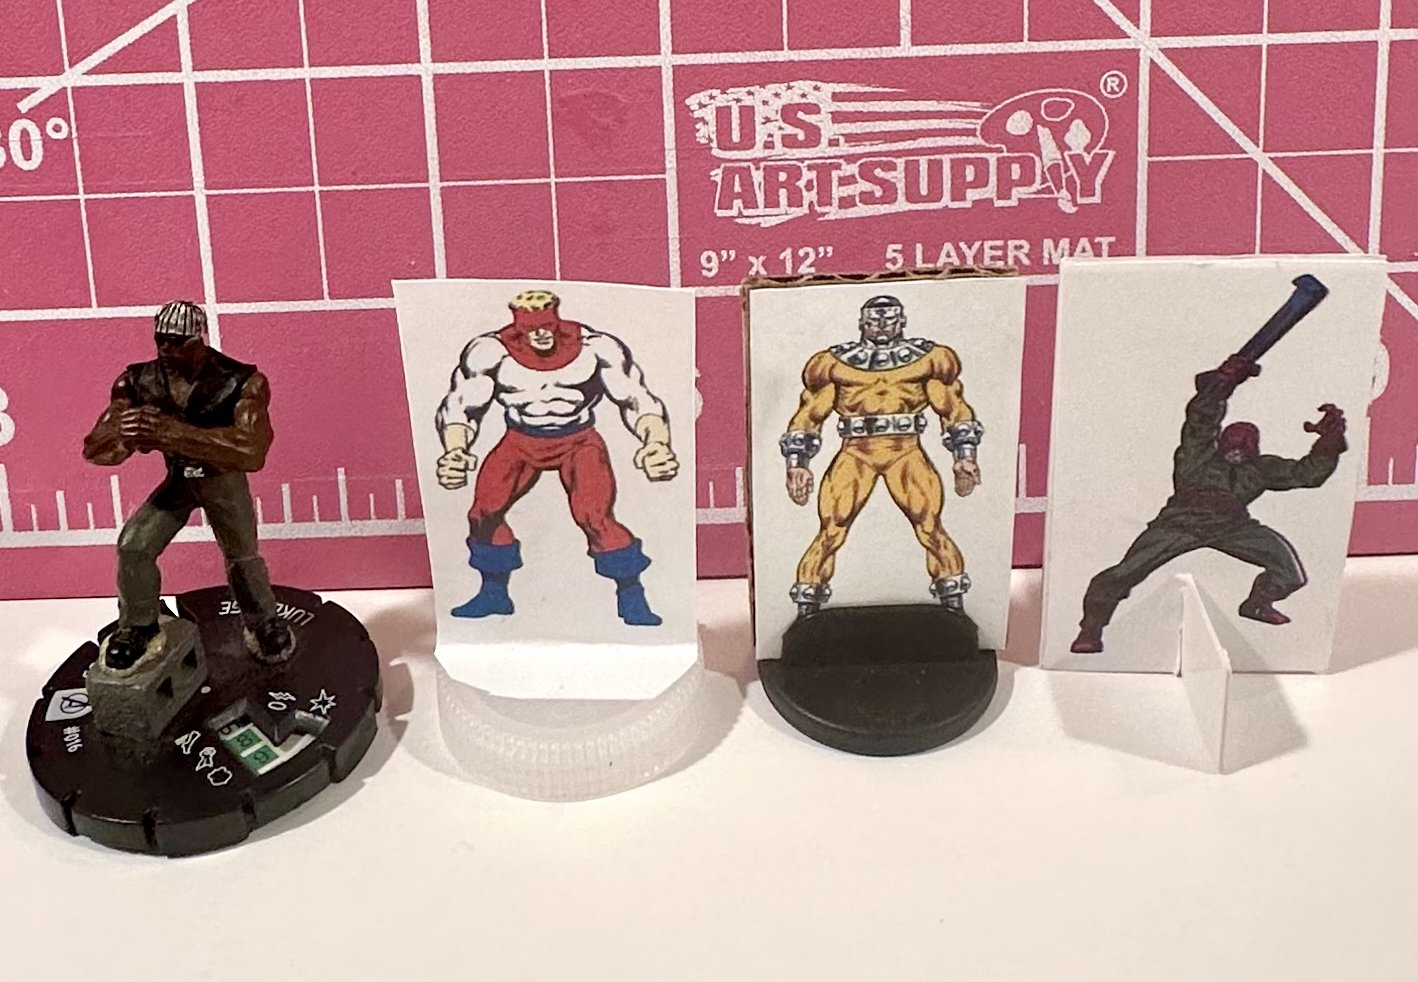
And that’s it! Here’s our Bulldozer next to a similarly sized Luke Cage.

APPROACH #2 - Using a plastic bottlecap
The second approach is a little more DIY, but only requires one item that you would otherwise just throw out or recycle - a plastic bottlecap.
Step 1: Trim your mini to size - this time leaving a half inch of space under the character’s feet is mandatory.

Step 2: Glue the two pieces of paper together, back to back. Do NOT apply any glue to the bottom 1/2 inch. Let dry (again, you can put something plastic on top of it to weigh it down to make sure it stays). After it is dry, fold the unglued 1/2 inch of paper, so it looks like the below.

Step 3: Before gluing the mini to the base, there are a couple things that you can do to add durability and stability. First, carefully score the top of the bottlecap with a hobby knife. Glue will stick easier to a scored surface than a completely flat one. Second, you can optionally weight the bottle cap down by gluing a penny or two on the inside.
Once you do that, just trim the corners off the paper base so it’ll fit on the cap, and then glue it to the plastic, and you’re done! Here’s Piledriver next to Luke Cage for scale.

APPROACH #3 - Using cardstock
Step 1: This might be the easiest approach, especially if you have a printer than is capable of printing on cardstock. If you do, just print up two copies, trip as before, and glue them together. Or print up a single copy if you’re okay with it not having a back, and you can avoid glue altogether.
If you don’t have such a printer, you can use any ol’ piece of cardstock you have lying around. I used a comic book board since I have those readily at hand. Print the image on paper as you did in the prior approaches, and trim. Cut a piece of cardstock to the size of your trimmed paper, and glue to each side as we’ve done in previous examples.
Step 2: Cut a smaller piece piece of cardstock 1 inch by a 1/2 inch. (see below)
Step 3: Make a 1/4 in cut in the middle of the mini and in the 1” x 1/2” cardstock. (see below)
One note, a pose with a little space between their feet works best for this approach, so you’re not cutting through the art.

Step 4: Connect them! If it is tight, you can carefully remove slivers of cardstock. Go slowly, as you can’t undo this if you do too much. If the base is uneven, it is likely because you need to make one of the 1/4” cuts a little deeper. Do this very slowly and carefully to make sure you don’t cut too much.
If you slip up and your cuts were either too wide or too deep, and the mini feels unstable - it isn’t anything that a dab of glue couldn’t solve. I got lucky and the below Wrecker doesn’t have any glue holding it together and it is pretty stable.

PROS AND CONS OF EACH APPROACH:
Approach #1 (Plastic Card Stand):
Pros: A guaranteed flat and stable base, and you can remove the cardboard minis to easily store when you’re not using, so you don’t need to have a ton of the bases.
Cons: This option does require a minimal cost, if you don’t have the bases on hand. Also, corrugated cardboard is visible on the sides (you can always cover with white paper if that’s bothersome).
Approach #2 (Plastic Bottlecap)
Pros: No cost, as you’re using a material that would ordinarily be thrown away. The image itself looks great - nothing covering the feet or cutting into the pic
Cons: This is probably the least durable approach, as it is the most dependent on glue.
Approach #3:
Pros: Very durable, as there’s no glue needed to keep the mini attached to the base. Minimal cost.
Cons: Getting a perfectly flat base, or preventing a loose fit both require more skill and practice than the other approaches. Also, it is the lightest of the miniatures, meaning it is the most likely to get knocked around unintentionally in a combat.
In my estimation, the winner is…..
… Option 1!
How about you? Which option appeals most to you? Are there any others you’ve tried? Interested in any similar articles (like how to rebase a Heroclix miniature onto a 1” base? Let me know in the comments and thanks so much for reading.